セラロンダ
旅行ガイド


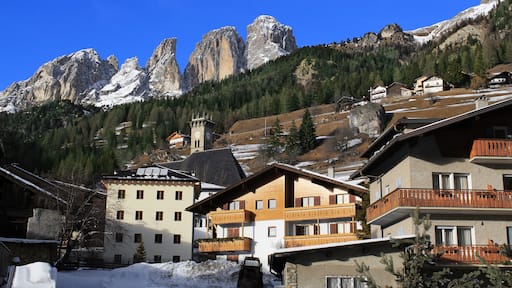
リンダー サイクリング ホテル
Via Nives 36 Selva di Val Gardena BZ
1月13日から1月14日までの料金は1泊あたり¥50,730です
¥50,730
合計 ¥57,126
1 月 13 日 ~ 1 月 14 日
税およびサービス料込み
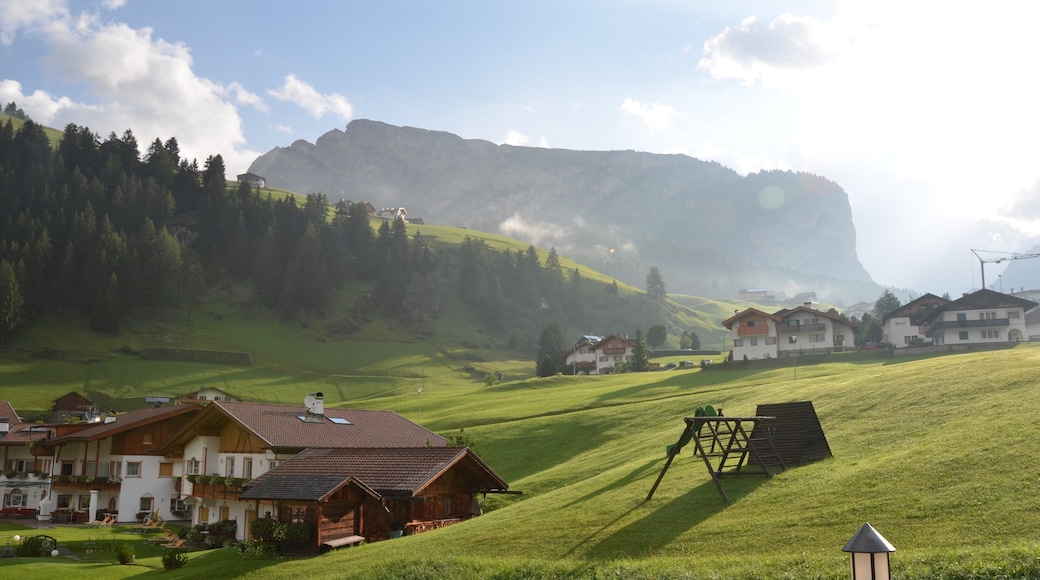
サルヴォ ディ ヴァル ガルデーナにあるスキーを楽しめるホテル。朝食 (無料)、WiFi (無料)、駐車場 (無料)が利用可能です。人気観光スポットのヴァル ガルデーナとチャンピーノイ �ゴンドラが近くにあります。
9.6/10 Exceptional! (口コミ 154 件)
Tadellos
口コミ投稿日 : 2025 年 12 月 15 日

レジデンス アンタレス
Via Meisules 195 Selva di Val Gardena BZ
1月14日から1月15日までの料金は1泊あたり¥36,700です
¥36,700
合計 ¥41,363
1 月 14 日 ~ 1 月 15 日
税およびサービス料込み
サルヴォ ディ ヴァル ガルデーナにあるスキーを楽しめるレジデンス。WiFi (無料)、朝食 (有料)、ルームサービスが利用可能です。口コミでは親切なスタッフが高評価。人気観光スポットのヴァル ガルデーナとチャンピーノイ ゴンドラが近くにあります。
8.8/10 Excellent! (口コミ 251 件)
The back part of the first floor smell like smoke. Otherwise location is excellent and breakfast was awesome
口コミ投稿日 : 2025 年 10 月 4 日

アパートメンツ ボエ
Strada Paul 40 Santa Cristina Val Gardena BZ
サンタ クリスティーナ ヴァルガルデーナのホテル。WiFi (無料)、駐車場 (無料)、ハイキング / サイクリング (敷地内)が利用可能です。人気観光スポットのヴァル ガルデーナとモンテ パナ スキー リフトが近くにあります。
8.8/10 Excellent! (口コミ 99 件)
Excellent
口コミ投稿日 : 2025 年 8 月 15 日
表示料金は、過去 24 時間における 1 泊大人 2 名利用時の最低価格です。料金および空室状況は変動する場合があります。別途、利用規約が適用される場合があります。
レジデンス アンタレス
Via Meisules 195 Selva di Val Gardena BZ
サルヴォ ディ ヴァル ガルデーナにあるスキーを楽しめるレジデンス。WiFi (無料)、朝食 (有料)、ルームサービスが利用可能です。口コミでは親切なスタッフが高評価。人気観光スポットのヴァル ガルデーナとチャンピーノイ ゴンドラが近くにあります。
8.8/10 Excellent! (口コミ 251 件)
The back part of the first floor smell like smoke. Otherwise location is excellent and breakfast was awesome
口コミ投稿日 : 2025 年 10 月 4 日

アンナ ロッジズ ドロミテス
Strada Cisles 25 Santa Cristina Val Gardena BZ
サンタ クリスティーナ ヴァルガルデーナにあるスキーを楽しめるレジデンス。WiFi (無料)、サウナ、庭園が利用可能です。人気観光スポットのヴァル ガルデーナとフニヴィア サスロン スパが近くにあります。
9.8/10 Exceptional! (口コミ 38 件)
I have no words to describe this incredible place. 1000% recommended
口コミ投稿日 : 2025 年 12 月 7 日

ラ タンブラ B&B レジデンス - セントラル ウィズ レストラン
Via Dursan 13 Santa Cristina Val Gardena BZ
サンタ クリスティーナ ヴァルガルデーナのレジデンス。WiFi (無料)、駐車場 (無料)、空港シャトルサービス (有料)が利用可能です。人気観光スポットのヴァル ガルデーナとモンテ パナ スキー リフトが近くにあります。
9.8/10 Exceptional! (口コミ 16 件)
Very cozy apartment with very useful facility like laundry and we enjoyed breakfast
口コミ投稿日 : 2025 年 11 月 4 日
表示料金は、過去 24 時間における 1 泊大人 2 名利用時の最低価格です。料金および空室状況は変動する場合があります。別途、利用規約が適用される場合があります。
人気の観光スポット
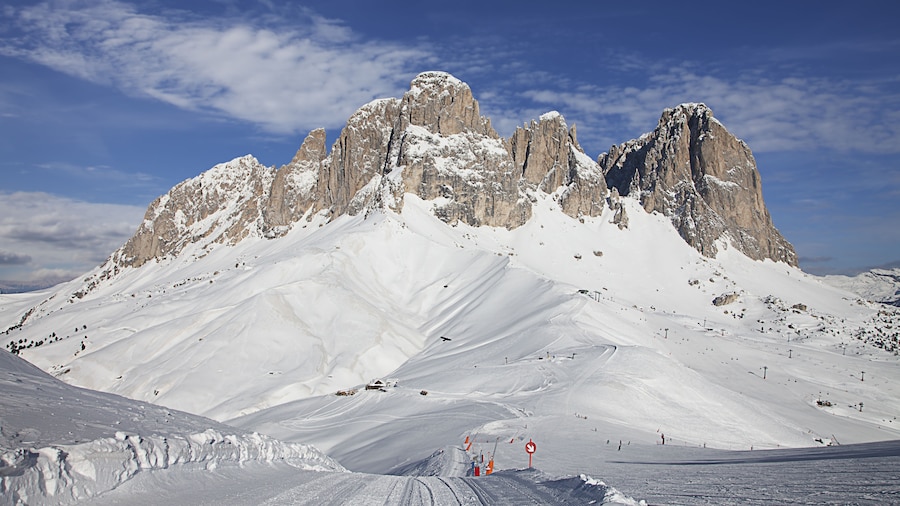
ドロミーティスキーツアー
サルヴォ ディ ヴァル ガルデーナではドロミーティスキーツアーに足を運び、ゲレンデを制覇しましょう。他にもこの趣のあるエリアでは、山の眺望を存分に満喫し、ハイキング コースに出かけて楽しみましょう。

Dantercepies セッラ スキーエリア
サルヴォ ディ ヴァル ガルデーナではDantercepies セッラ スキーエリアに足を運び、ゲレンデを制覇しましょう。他にもこの趣のあるエリアでは、山の眺望を存分に堪能し、スパをじっくりと訪れましょう。
チャンピーノ セッラ スキー エリア
サルヴォ ディ ヴァル ガルデーナではチャンピーノ セッラ スキー エリアに足を運び、ゲレンデを制覇しましょう。他にもこの趣のあるエリアでは、山の眺望を存分に満喫し、ハイキング コースに出かけて楽しみましょう。
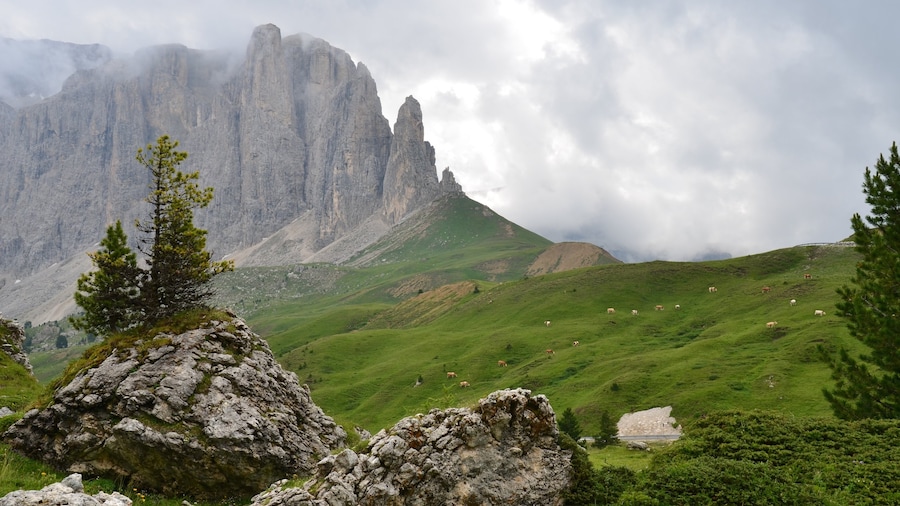
セッラ・ロンダ・イン・MTB
コルヴァーラ イン バディーアでは、セッラ・ロンダ・イン・MTBに足を運んで、スキーなどの人気アクティビティを体験 ! 他にもこの趣のあるエリアでは、山の眺望を存分に満喫し、ハイキング コースに出かけて楽しみましょう。
ヴァル スキー リフト
サルヴォ ディ ヴァル ガルデーナ旅行中には、ヴァル スキー リフトをじっくり訪ねることができるでしょう。他にもこの趣のあるエリアでは、山の眺望を存分に満喫し、ゲレンデに出かけて楽しみましょう。


エクスペディアで世界の旅へ
- オルティセイの 2 つ星ホテル
- アルタ バディアの 3 つ星ホテル
- アルバの 4 つ星ホテル
- オルティセイの 4 つ星ホテル
- アルバの 5 つ星ホテル
- サンタ クリスティーナ ヴァルガルデーナの 5 つ星ホテル
- アルバのホテル
- アルタ バディアのホステル
- アルタ バディアのスキー場周辺のホテル
- アルタ バディアの結婚式場のあるホテル
- アルタ バディアのホテル
- アルタ バディアのイン
- アルタ バディアのペンション
- アルタ バディアのリゾート
- バディアのホテル
- ブラのホテル
- カンペストリンのホテル
- カンピテッロ ディ ファッサのホテル
- カナツェイの朝食付きのホテル
- カナツェイのホテル
- コル ライザー ゴンドラ付近のホテル
- コルフォスコのホテル
- コンパチのホテル
- コルヴァーラ イン バディーアのスパのあるリゾート & ホテル
- コルヴァーラ イン バディーアのホテル
- ドルフィ ランド付近のホテル
- エオレスのホテル
- フォンタナッツォのホテル
- フラーラ ゴンドラ付近のホテル
- フレナのホテル
- フーネスのホテル
- ラ ヴィッラのホテル
- アンテルモイア湖付近のホテル
- マジンのホテル
- オルティセイのおしゃれな��ホテル
- オルティセイの高級ホテル
- オルティセイのカップルにおすすめのホテル
- オルティセイのホテル
- ペニアのホテル
- プランチョスのホテル
- サンタ クリスティーナ ヴァルガルデーナのスパのあるリゾート & ホテル
- サンタ クリスティーナ ヴァルガルデーナのホテル
- サンタ マッダレーナのホテル
- サルヴォ ディ ヴァル ガルデーナのホテル
- 153 ノレイ-チンクエ・ディタ
- 3 フルネス - セチェーダ 2518m
- 61 ステーガー・デライ
- アルペ ディ シウージの旅行情報
- アルタ バディアでの休暇
- アルタ バディアの旅行情報
- アンテルモイアの旅行情報
- バディアの旅行情報
- ボレスト スキー リフト
- ブレッサノーネの旅行情報
- カンペストリンの旅行情報
- カンピテッロ ディ ファッサの旅行情報
- カナツェイの旅行情報
- カレッツァの旅行情報
- カステルロットの旅行情報
- フォルケンシュタイン城
- キウーザの旅行情報
- サンアントニオ教会
- チッタ・デイ・サッシ
- コルフォスコの旅行情報
- コルマの旅行情報
- コルヴァーラ イン バディーアの旅行情報
- ファッサ バレーの旅行情報
- フローリアン スキー リフト
- フレナの旅行情報
- フーネスの旅行情報
- フル��ネス セチェーダ スキー リフト
- グドンの旅行情報
- カステルロットの旅行情報
- クリスチャニア スキー リフト
- ライオーンの旅行情報
- モエナの旅行情報
- モンテ パナ モン デ セウラ スキー リフト
- オルティゼーイ フルネス ゴンドラ
- オルティセイの旅行情報
- ペニアでの休暇
- ペニアの旅行情報
- ピザ プランセイエス スキー リフト
- ポッツァ ディ ファッサの旅行情報
- プエツ オードレ自然公園での休暇
- レシエザ フニキュラー
- サンペレグリノパスの旅行情報
- サンタ クリスティーナ ヴァルガルデーナの旅行情報
- サンタ マッダレーナの旅行情報
- サス ポルドイ ケーブル カー
- サッソルンゴ
- セチェーダ スキー エリア
- サルヴォ ディ ヴァル ガルデーナでの休暇
- サルヴォ ディ ヴァル ガルデーナの旅行情報
- シウジの旅行情報
- ヴィーゴ ディ ファッサの旅行情報
